Free 3D Printing for Students
What We Can Do for You
Here at the FIZ we offer free self-service printing for students in PLA plastic. Across our 20 3D printers we support student success and creativity.
Available Printers
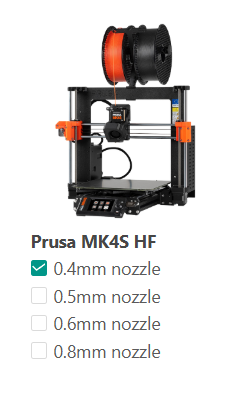
- Prusa MK4S (0.4mm high flow nozzles)
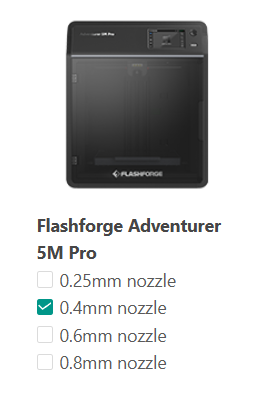
- Flashforge Adventurer 5 Pro (0.4mm nozzles)
Getting Started
Downloading OrcaSlicer
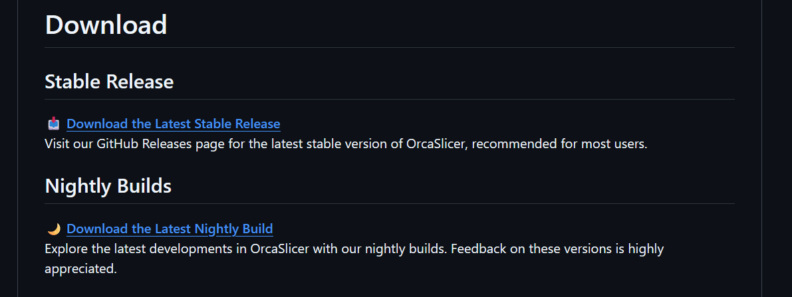
First, navigate to the OrcaSlicer Github at this link here (opens in new tab)
Scroll down to the Releases section and click on latest stable release.
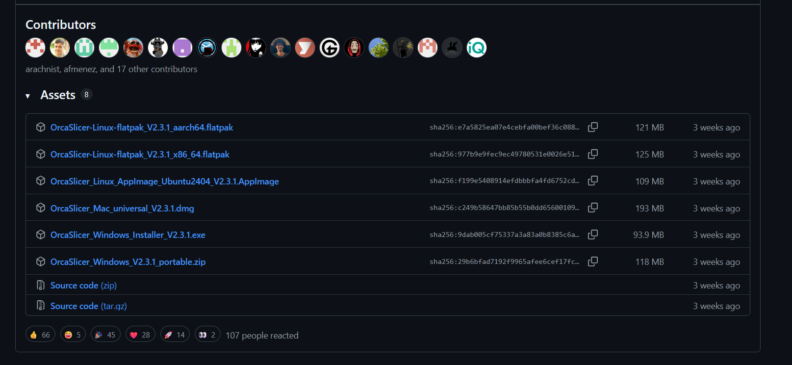
Now scroll down to Assets and select the correct installation download. Generally the installer will be the best option. If you run into issues with the installer, you can also try the portable version which is fully self contained and does not need permissions to run/install.
(This is useful for usage on the computers available in the FIZ, if you do not have a laptop or PC accessible)
Run the installer and then open the app. When you first open it the Setup wizard will start.

Click through relevant options until you get to the printer screen as pictured below.
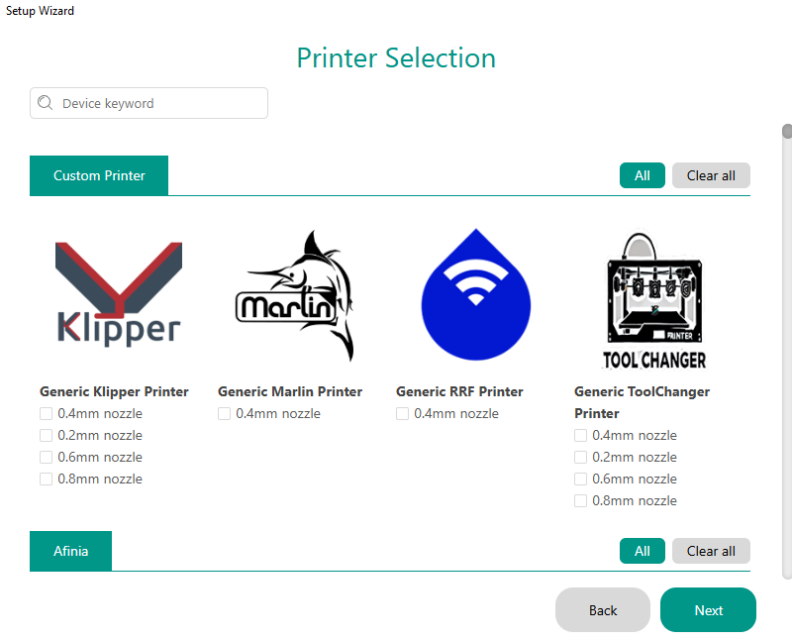
Select the profiles for each printer. The profiles for each printer in the FIZ you will want to select are as follows:
Select next and continue clicking through the setup until you get to filament selection. You can check any filaments you will use in the lower menu. In general, Flashforge generic or Prusa generic of PLA (the main material we have for you to use) will work for slicing.
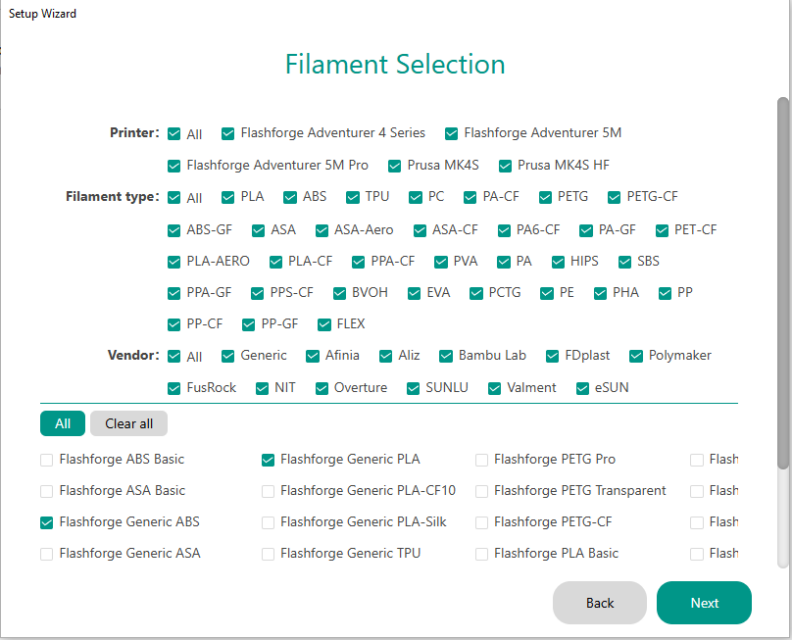
Click next and ignore the checkboxes for Plugins and Stealth mode until you finish the setup wizard.
Using OrcaSlicer
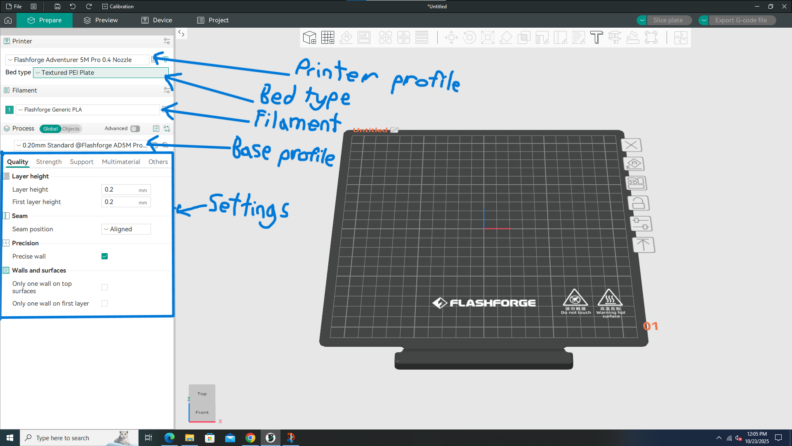
Click on new project, then ensure the correct printer profile (including nozzle size for the printer) and bed type. The Flashforges (5 Pro and 4 Lite) all use textured build plates and the Prusas all use smooth build plates. The Filament type should be the filament you plan on using. The settings are stored in several presets called process profiles. Generally the default standard one with 0.2mm layer height is adequate for most prints.
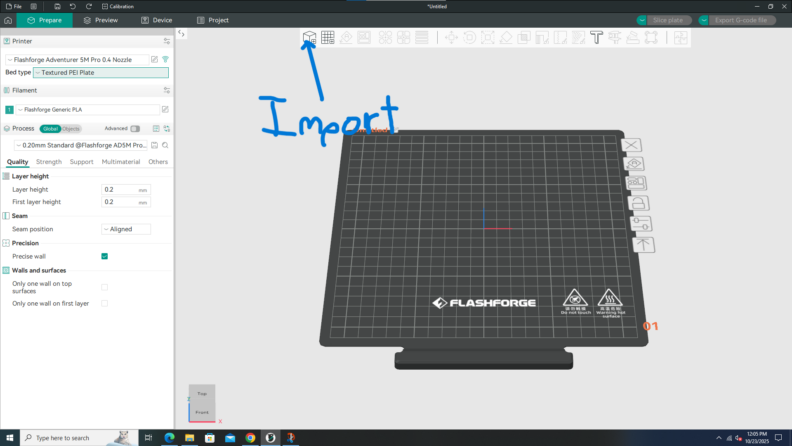
To import a model (main file types: STL, STEP, 3MF), click on the import object button to select files from your computer to the program.
Once you have your model imported and selected, you can navigate by rotating with left clicking on the background and you can move by right clicking the background. You can also use the tools here to move your model, rotate it, scale it, and several other options. For just getting started, you should select your object and click auto orient and arrange to get your part(s) in an optimal printing configuration. You can play around with the tools here if you have time and would like to learn more advanced techniques.
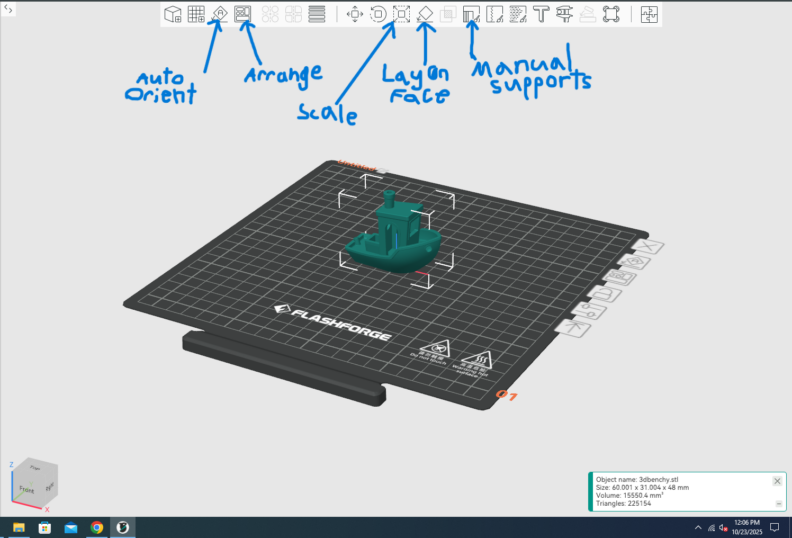
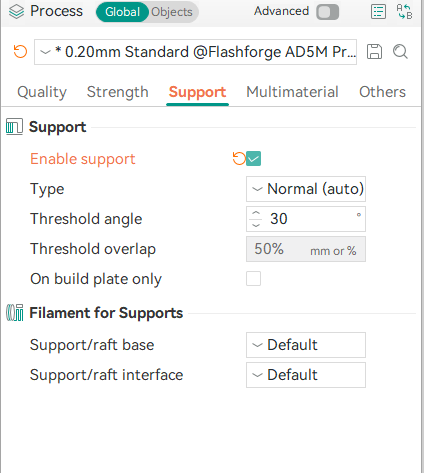
If your model has overhangs that are not supported on both sides or have a slope steeper than 40 degrees you should enable supports to ensure the print is successful. To do so, navigate along the process settings to the support tab and check the relevant boxes. You can play around with these settings to see what produces the best result.
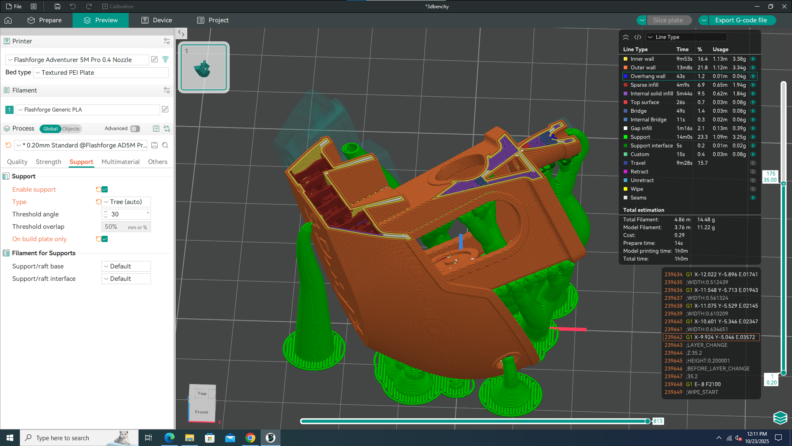
Once your settings are good, you can push the slice button in the top right of the screen. This will generate the G-code that the printer reads and gives you a preview of any supports and what the print will look like. The slider on the right side allows you to see the section view of the print at each layer level. You can make any changes you might want in your settings to fix problems that you notice here. In this image I would probably reorient the model to sit on a flat face to be easier to print. Any time you change settings you will have to slice it again.
Once you have the model sliced to your liking you can export the model to a flash drive by pushing the export G-code file button in the top right. Also take note of the estimated print times and material usage for your print to place in the sign up sheet for the printers in the FIZ.
Using the Prusa MK4S printers:
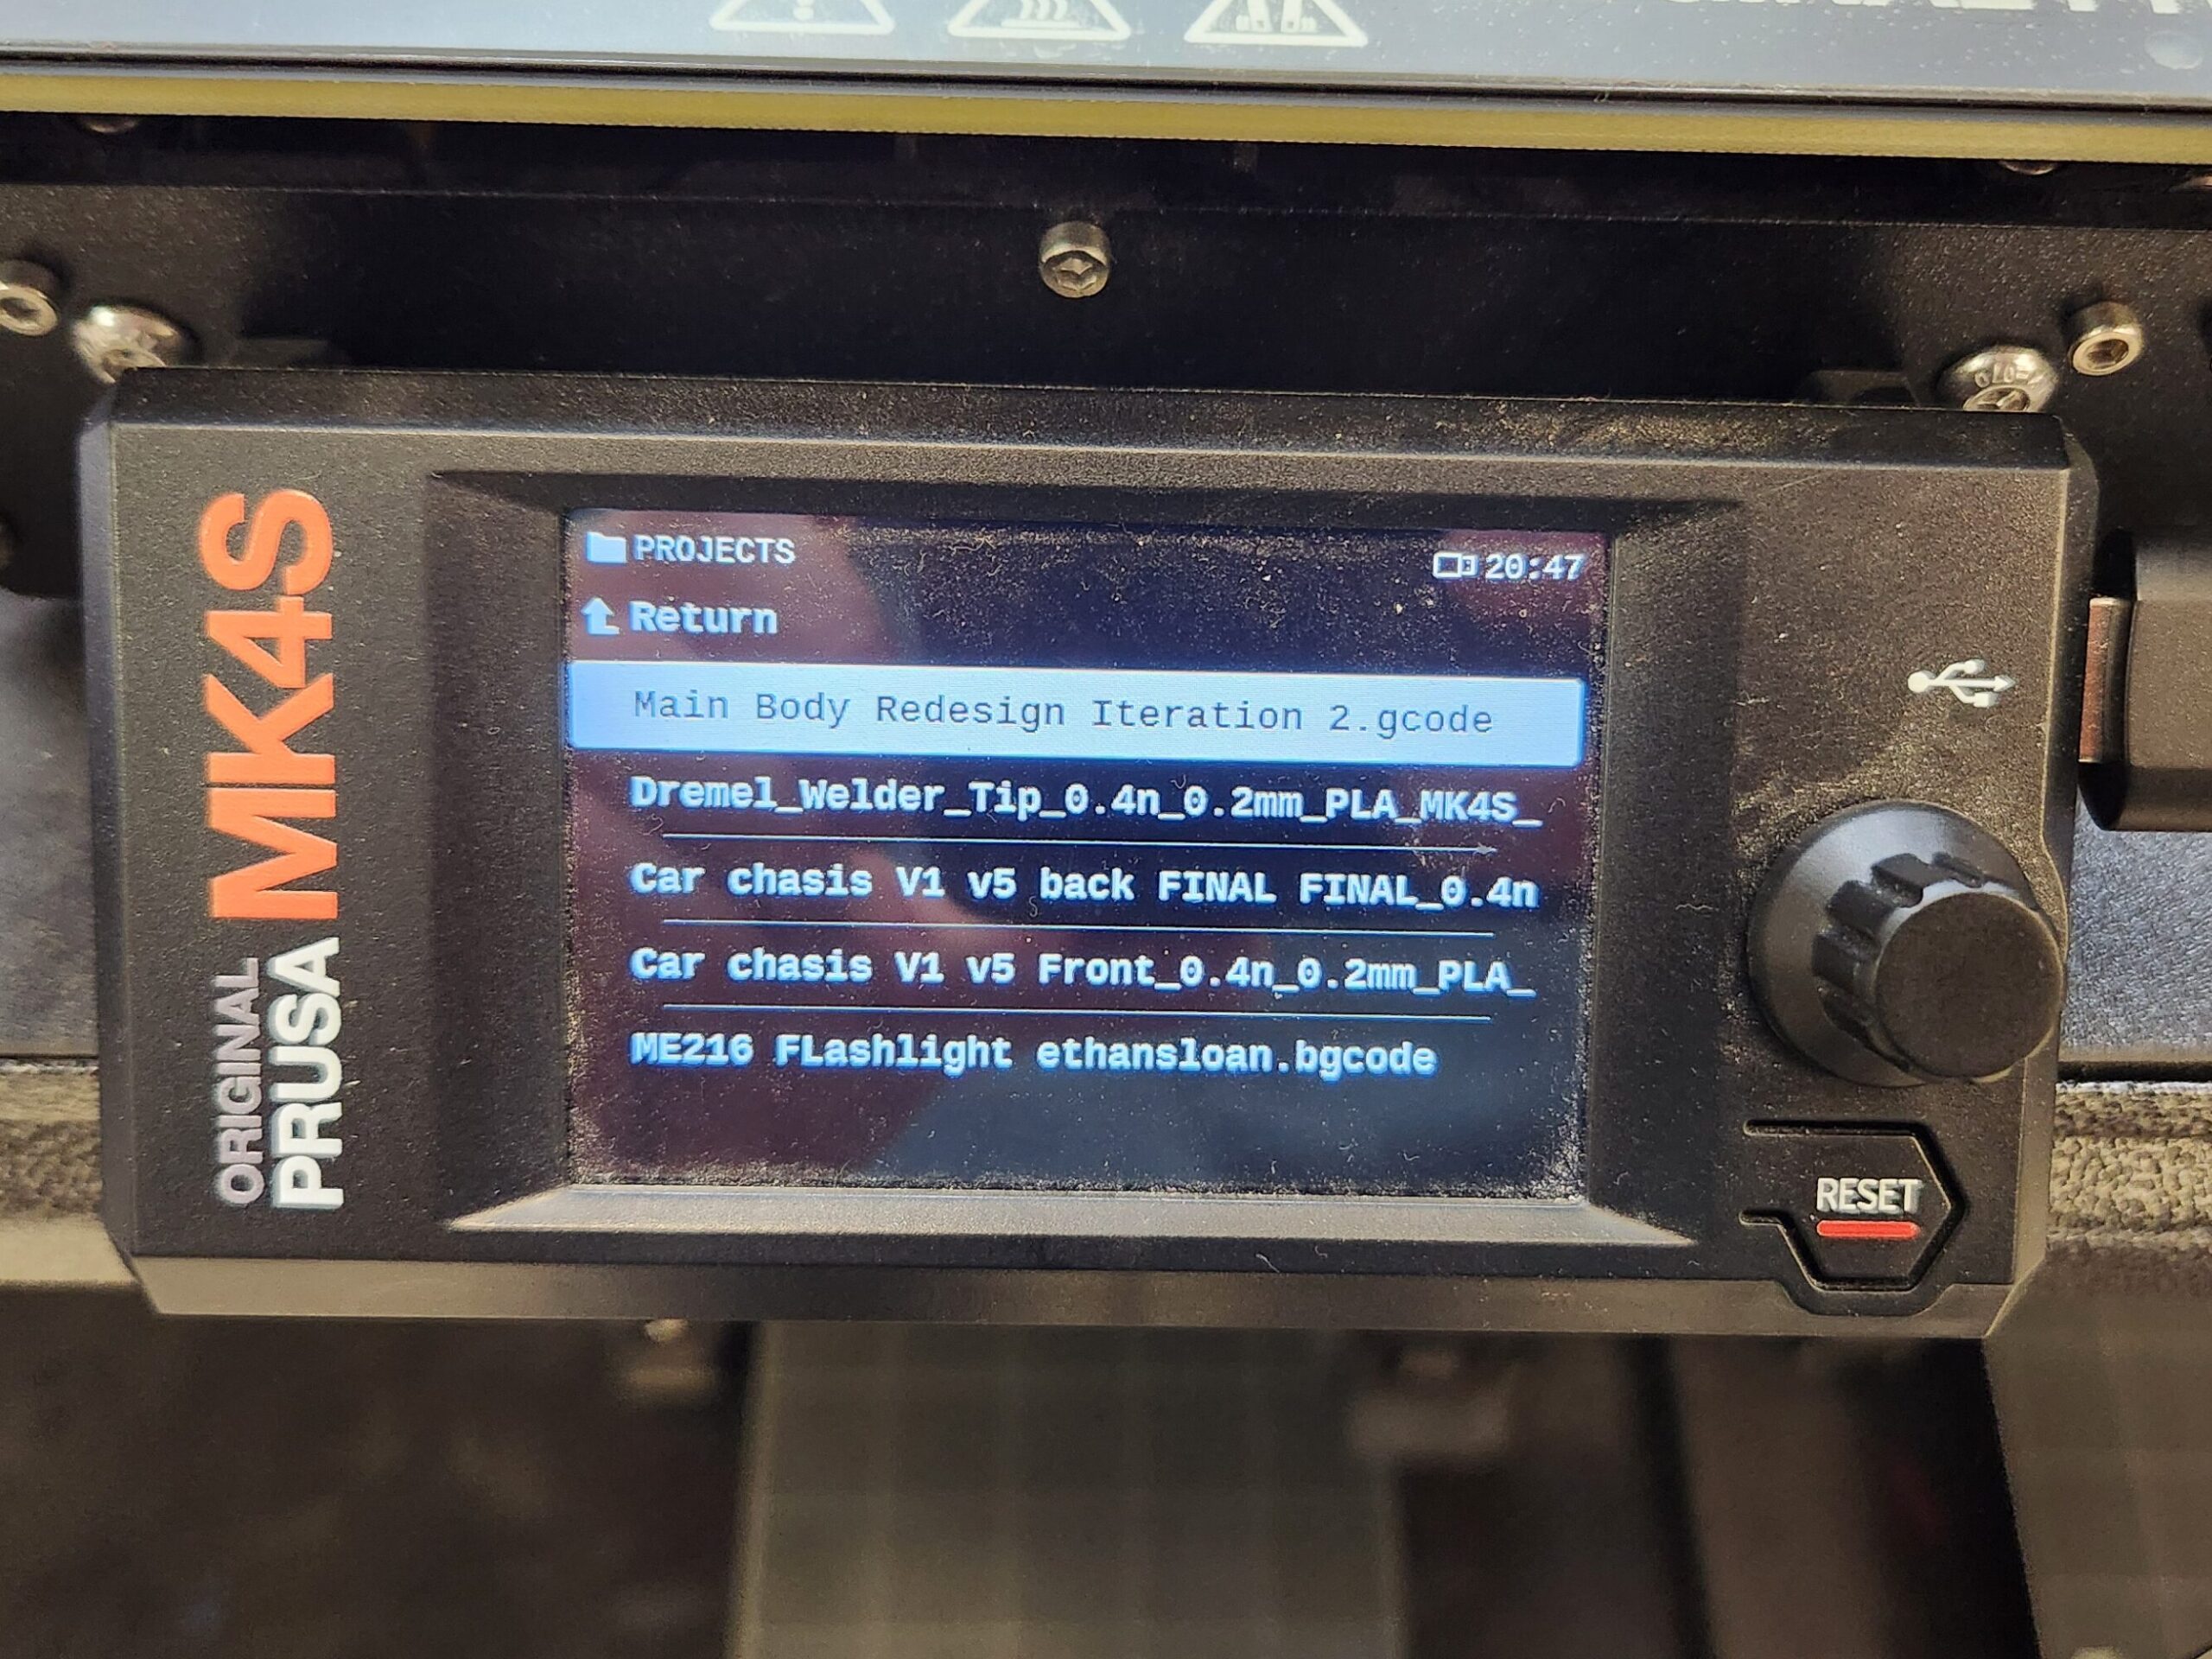
Once you have a G-code file on a flashdrive, you can place the drive in the usb port on the right side of the controls/display on the printer (IMPORTANT YOU MUST LEAVE USB DRIVE IN WHILE PRINTING). The upper right corner shows time, in the middle, there are 6 menu options, and at the bottom of the screen, you can see nozzle temperature, heatbed temperature, and type of material loaded into the printer.
To navigate the menu you can use the touch screen or rotate and click with the knob. To print files, you can select on the print button in the top left of the 6 menu options.
In the print menu you can select the file you wish to print.
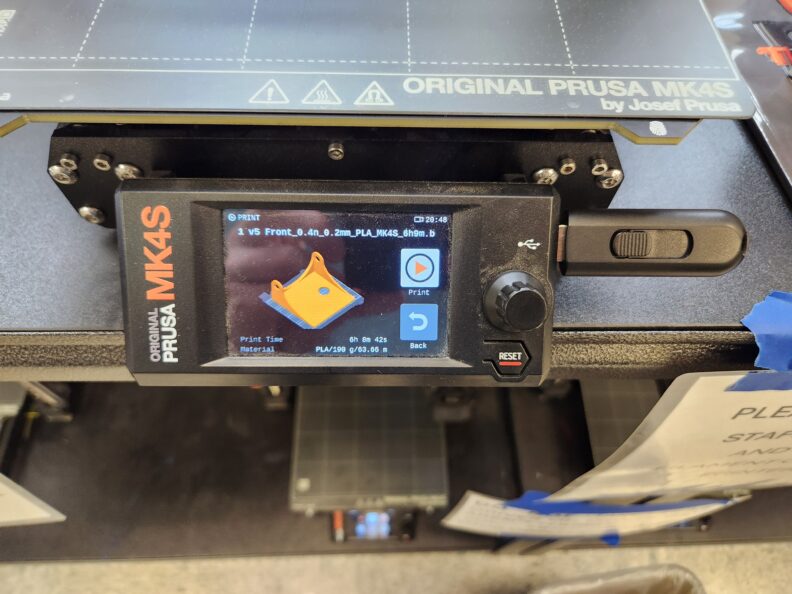
Then you can select the print option to print the file. This gives more estimates of the filament usage (grams) and the length of the print time in case you forgot to write it down in the signup sheet.
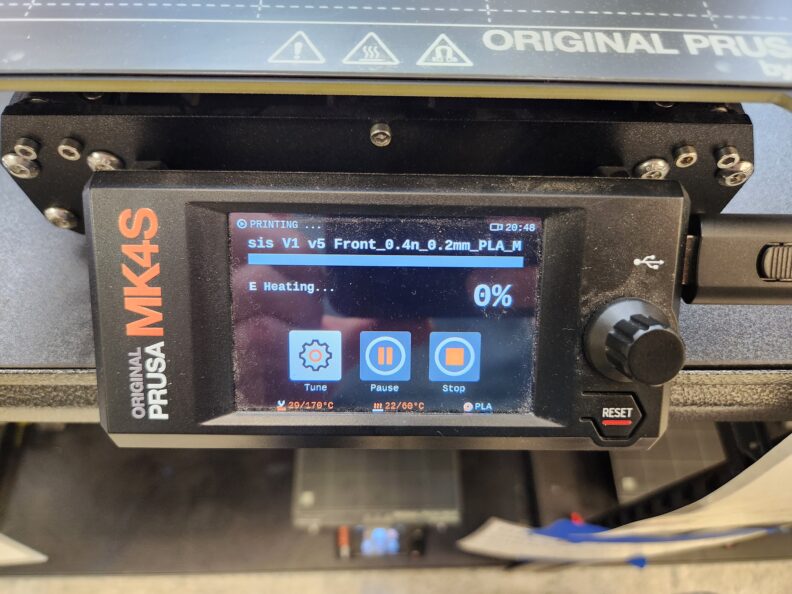
Once you have started the print, you are able to pause or stop it for whatever reason you might need. Ensure the first layer of the print sticks to the print bed before leaving the printer unattended as most print failures are in the first layer.
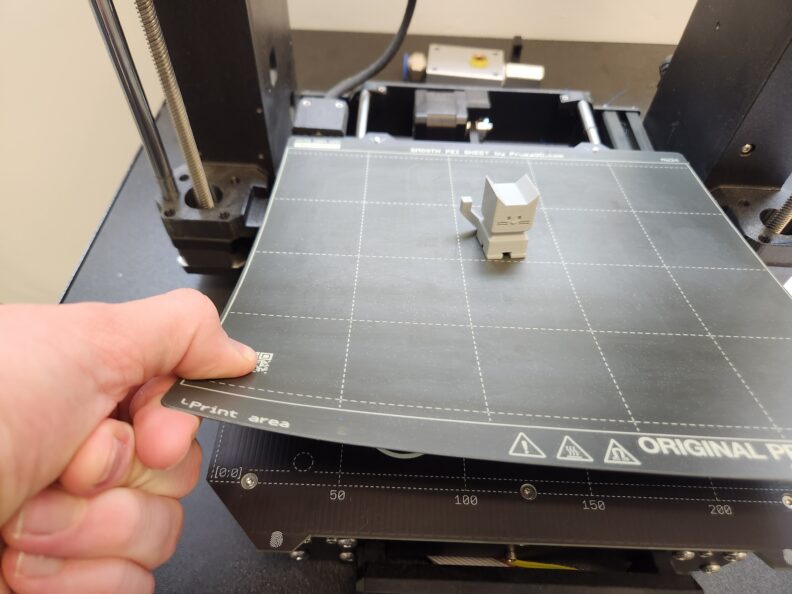
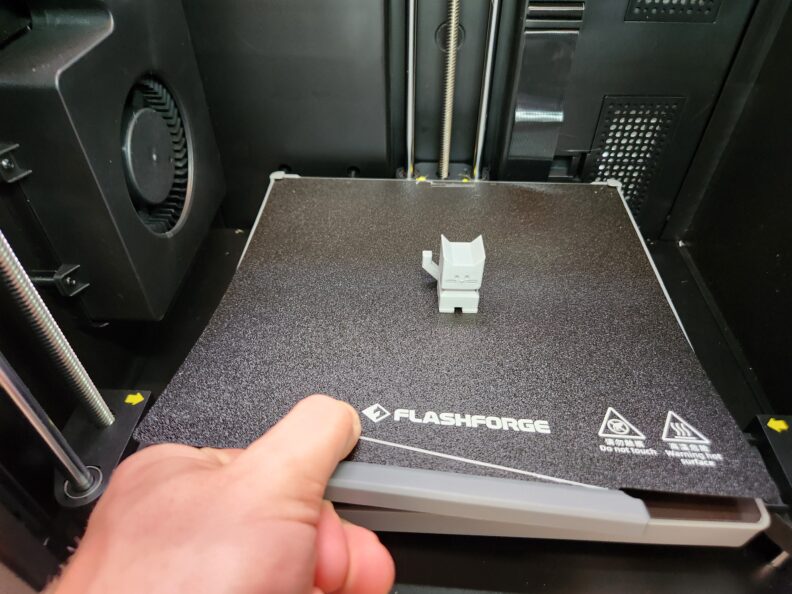
When the print is done, wait for the bed to cool, and then you can remove the print. You can bend the PEI sheet to help release parts, but most should come off easily once cool. If you need help, please ask FIZ employees.
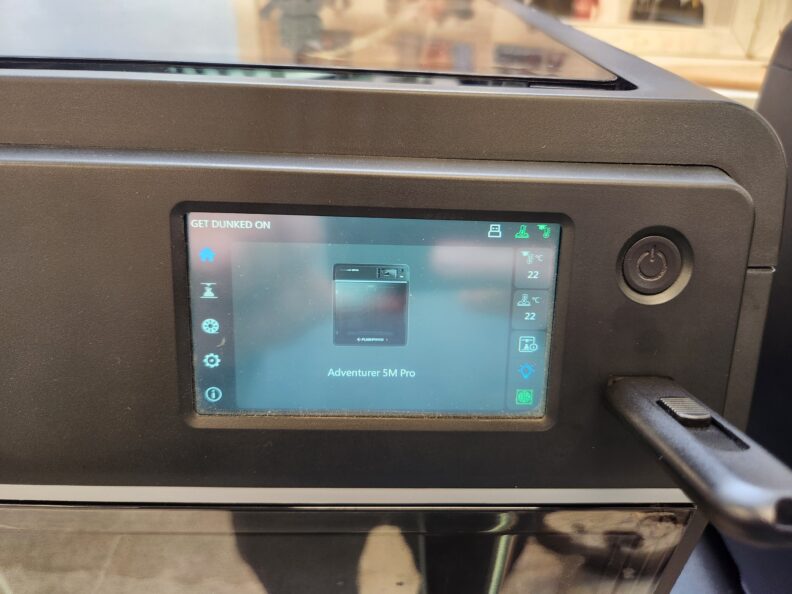
Using the Flashforge Adventurer 5 Pro Printers:
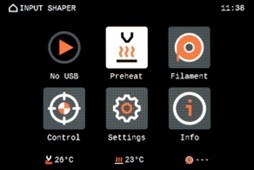
Make sure the printer is on (if not press the power button and it will initialize). Once you have the G-code on a flashdrive, you can plug the flash drive in to the printer. The screen is a touchscreen and easy to navigate.
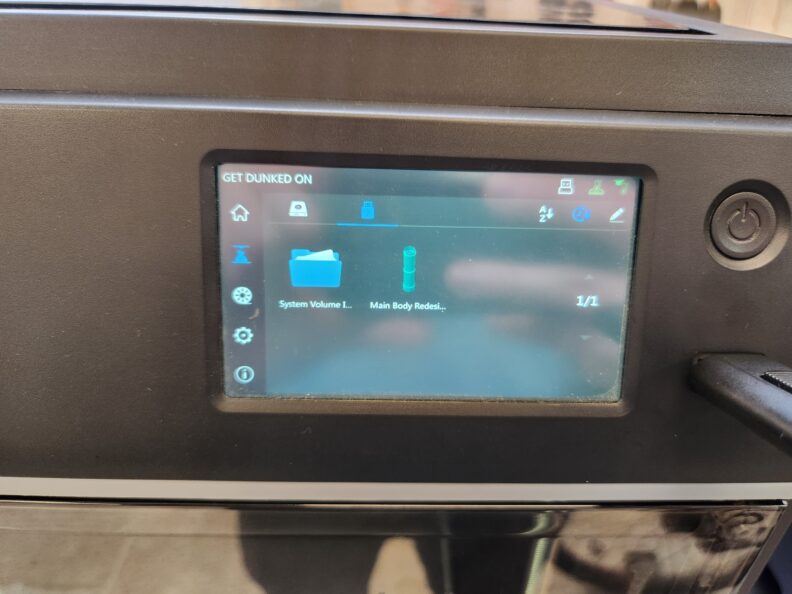
Select the file you want to print from the flashdrive dropdown in the printing tab (The second menu option).
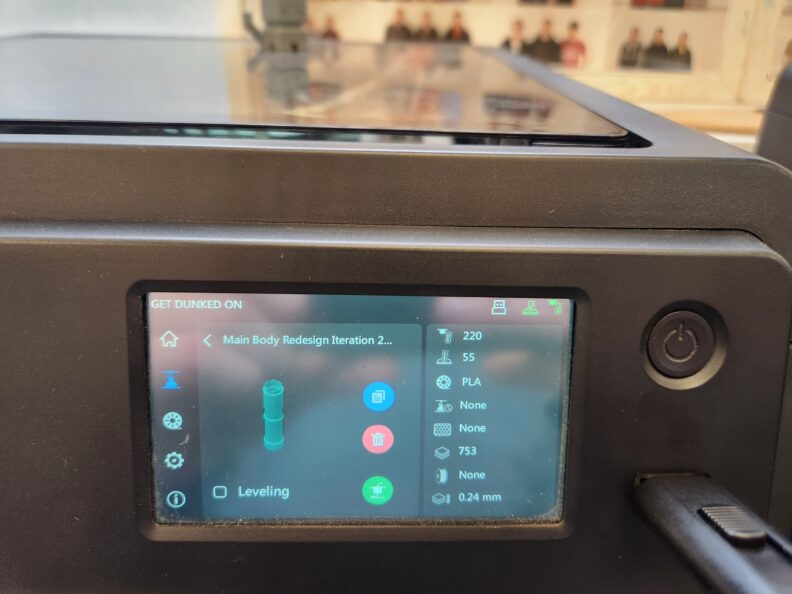
Now you can select the print option to print the file. This gives more estimates of the filament usage (grams) and the length of the print time in case you forgot to write it down in the signup sheet. Make sure to check the box leveling for automatic bed leveling. The file will automatically be copied over to the printer and you can remove your flash drive.
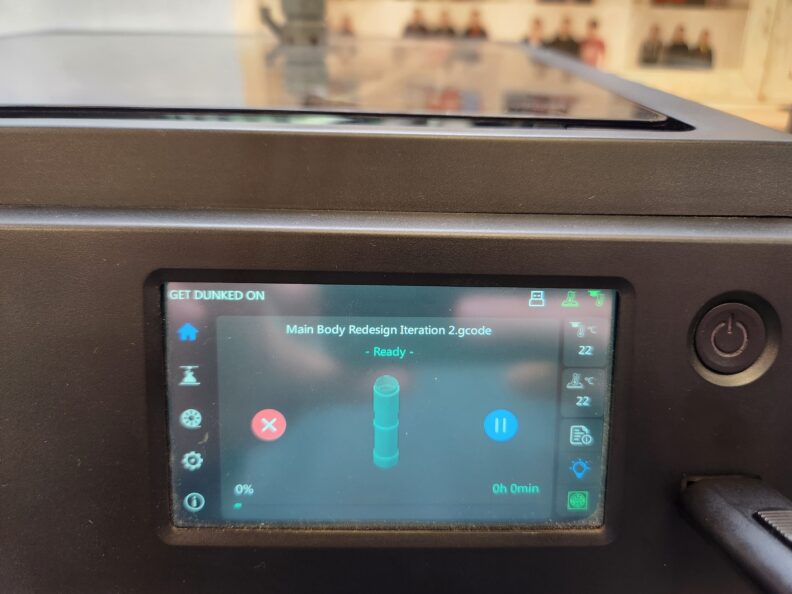
While printing you can cancel or pause the print if needed. Ensure the first layer goes down before you leave the printer unattended due to most prints failing on the first layer.
When the print is done, wait for the bed to cool, and then you can remove the print. You can bend the PEI sheet to help release parts, but most should come off easily once cool. If you need help, please ask FIZ employees.
Additional Resources:
(The rest of the page are links that open in new tabs)
- OrcaSlicer Github (Wiki for Orcslicer)
- All3DP OrcaSlicer Tutorial (Helpful guide for Orca Slicer)
- OrcaSlicer 101 Video (Orca Slicer Tutorial)
- Planet3DP OrcaSlicer Tutorial Video (Orca Slicer Tutorial)
- OrcaSlicer Setup Video (Orca Slicer Set Up Tutorial)